Thursday, 21 June 2012
Moon Phase Calculator
Well it's been a while since I last posted and thats because even if I did get a nice clear night I would have to stay up really late to wait for it to get properly dark. So while I havent been doing any astronomy I have been learning to do basic computer programming, I have been learning a programming language called small basic which is for beginners. After about 1 week of learning it I have finished my first program, a moon phase calculator, it isnt the most precise but I was pretty happy with it for my first ever coding project. If you would like to learn small basic the link is here. Any feed back on my moon phase calculator would be appreciated. To view my moon phase calculator click here.


Wednesday, 6 June 2012
Street Light Turn Off For Astronomy
Well I was browsing the Internet today and I was very pleased to find out that
8,500 street lights across Shropshire will be switched off between midnight and 5:30 am. The main reasons the council is turning off the street lights is to save money and to be more Eco friendly, but it also means that amateur astronomers will be able to get better views of the sky. This is great news because a lot of the light pollution that ruins the night sky is caused by the light from street lights spilling up into the sky. This light pollution is most evident when taking long exposure images of the sky, because the longer your exposures are the more of an orange glow your image has. And you try and take really long exposures then the image goes completely orange and is unusable. If you don't take long exposure images then you can still benefit because the less light pollution there is then the more stars you can see in the night sky, as you will be able to see stars with much higher magnitudes. If you are interested in finding out wether or not the street lights near you are being turned then you can visit your local councils website to find out. Leave a comment below in wether or not the street lights near you are being turned off.
8,500 street lights across Shropshire will be switched off between midnight and 5:30 am. The main reasons the council is turning off the street lights is to save money and to be more Eco friendly, but it also means that amateur astronomers will be able to get better views of the sky. This is great news because a lot of the light pollution that ruins the night sky is caused by the light from street lights spilling up into the sky. This light pollution is most evident when taking long exposure images of the sky, because the longer your exposures are the more of an orange glow your image has. And you try and take really long exposures then the image goes completely orange and is unusable. If you don't take long exposure images then you can still benefit because the less light pollution there is then the more stars you can see in the night sky, as you will be able to see stars with much higher magnitudes. If you are interested in finding out wether or not the street lights near you are being turned then you can visit your local councils website to find out. Leave a comment below in wether or not the street lights near you are being turned off.
Saturday, 26 May 2012
How to image a satellite with a telescope
I hope you all enjoyed my last post on how to image a satellite using the long exposure method, this time its time for method 2 how to image a satellite using a telescope. The things you need to image a satellite using a telescope are camera ( it will need a camera adapter so that you don't have to hold it) or webcam, a dobsanian or alt az telescope (you could try with an equatorial but it would be allot more difficult), and preferably a compass as well. The first thing you will need to do is visit the heavens above website and find out when the next ISS pass is and what direction it comes from, you can image other satellite but its best to start with the ISS as it is really big so you should be able to make out some detail on it. On the night that the pass is due over you need to to take your telescope and camera outside about an hour before the pass is due to let them cool, you then need to align your scopes finder perfectly. About 10 minutes before the pass you need to loosen all the locking bolts on your telescope and point it in the right direction using you compass. Also you need to set your camera to the highest frame rate possible to stop and motion blur. For your first pass you might want to use quite a low magnification to keep it in the field of view easier, then use the higher magnifications once you've had a bit of practise. Then about 1 minute before the pass is due you need to start recording with your camera or webcam. As soon as you see the ISS coming over the horizon you need to start tracking it with your finder scope ( a non magnified finder is best for this) , it will move very quickly across the sky so it will be hard to keep up with. Once the ISS has gone over the horizon you can now see what footage you managed to capture, your video will mostly contain a lot of empty frames and only a couple of ISS frames ( with practise you will manage to get more ISS frames in one pass.
Now that you have your video file you need to get rid of all the empty frames using virtual dub there's a tutorial for people who haven't used it before: tutorial, now you will be left with a very short movie file with only frames of the ISS in it, but you will have noticed that the ISS jumps around a lot in it.The next step is to process are video file using a program called castrator all you have to do is put in the video, select the brightness and the video size and it will then create a video file for you with the ISS in the centre of every frame. You can now either just use an individual frame for your image or you can process it in registax, you process it just like a video file of the moon. You will now be left with a single image which you can process in any software that you us for your other astrophotography images for instance photoshop. Once you have finished this process you will have your own image of the ISS. With practise you will be able to improve the image, if you have any questions feel free to contact me. Post any comments or tell me about your satellite imaging attempt below.
Part 1 is here.
Now that you have your video file you need to get rid of all the empty frames using virtual dub there's a tutorial for people who haven't used it before: tutorial, now you will be left with a very short movie file with only frames of the ISS in it, but you will have noticed that the ISS jumps around a lot in it.The next step is to process are video file using a program called castrator all you have to do is put in the video, select the brightness and the video size and it will then create a video file for you with the ISS in the centre of every frame. You can now either just use an individual frame for your image or you can process it in registax, you process it just like a video file of the moon. You will now be left with a single image which you can process in any software that you us for your other astrophotography images for instance photoshop. Once you have finished this process you will have your own image of the ISS. With practise you will be able to improve the image, if you have any questions feel free to contact me. Post any comments or tell me about your satellite imaging attempt below.
Part 1 is here.
Saturday, 19 May 2012
How to take a long exposure image of a satellite
Well we have had over a month of pretty much solid rain here in Shrewsbury so no stargazing could be done. So I have decided to make a post explaining the process of tracking a satellite with a telescope. At night often lots of satellites pass overhead often with different brightneses the brightest one that will pass over is the iss which is very bright therefore you don't need to use a telescope or binoculars to see it. The iss passes overhead very quickly like its a plane and will be the brightest thing in the sky apart from the sun and the moon. Once you have practised seeing the iss a few time you may want to attempt looking at other satellites like tiangog 1. Once you have seen a satellite pass over a couple of times you may want to try to image it. If you are trying to image a sattelite the best one to choose is the iss as it is one of the few satellites that you can see detail on due to its huge size. There are 2 methods for imaging a satellite they are long exposure via a camera and using a telescope to capture a close up image of it.
The first one that I will focus on is a long exposure image of a satellite. The equipment you will need for this is a camera which can take long exposure or if your camera can take short exposures you could take them one after another and then stack them using a program called startrails http://www.startrails.de/html/software.html . Also you will need a camera tripod and preferably a cable release for your camera as this will mean that your camera does not shake will you are holding down the shutter button.The first step is to check out when the iss will be passing over your house and which directions it will be coming from. Next you need to go outside about an hour before the pass ( to give your camera time to cool ) and put your camera on your tripod and face it in the direction that the iss will come from. Next you need to set your camera to the highest exposure setting or if your camera has it the bulb setting, the final step is to set your camera to the widest aperture possible. Now you just have to wait till the iss comes into your camera view and start the exposure, and then when it is just about to leave the camera view you end the exposure. You can now edit your photo with whatever processing software you normally use. Now to you can look at your image and see how you want to improve it for next time, for instance a more interesting setting e.t.c Good luck! I will post the guide to imaging method 2 next week. If you have any questions feel free to contact me. I wish you clear skies.
The first one that I will focus on is a long exposure image of a satellite. The equipment you will need for this is a camera which can take long exposure or if your camera can take short exposures you could take them one after another and then stack them using a program called startrails http://www.startrails.de/html/software.html . Also you will need a camera tripod and preferably a cable release for your camera as this will mean that your camera does not shake will you are holding down the shutter button.The first step is to check out when the iss will be passing over your house and which directions it will be coming from. Next you need to go outside about an hour before the pass ( to give your camera time to cool ) and put your camera on your tripod and face it in the direction that the iss will come from. Next you need to set your camera to the highest exposure setting or if your camera has it the bulb setting, the final step is to set your camera to the widest aperture possible. Now you just have to wait till the iss comes into your camera view and start the exposure, and then when it is just about to leave the camera view you end the exposure. You can now edit your photo with whatever processing software you normally use. Now to you can look at your image and see how you want to improve it for next time, for instance a more interesting setting e.t.c Good luck! I will post the guide to imaging method 2 next week. If you have any questions feel free to contact me. I wish you clear skies.
Friday, 11 May 2012
How to balance a telescope
Below is a video showing what your telescope should be like when corrclty balanced. BTW I am putting the telescope into a position then letting it go.
Tuesday, 1 May 2012
How to use telescope setting circles
Due to the current thick clouds overhead i have not been able to do astronomy for a couple of weeks now, this also means that I missed both of the occulations :( . So i have decided to make a post on how to use telescope setting circles. On some telescopes mounts (mainly equatorial) there are 2 dials called setting circles, one of them is called right ascension and the other is declination. These are basically the latitude and longitude of the sky, the declination is the latitude and the right Ascension is the longitude. The setting circles on a telescope are used to easily locate object that aren't easily visible to the naked eye. Once you have set your telescope up at night you will have to align the right ascension setting circle, but you wont have to align the declination ( if you are using a equatorial telescope make sure that the tilt is set to your latitude, this will have most likely been done when you bought your telescope).
The RA circle is marked in hours and then minutes each hour will have its hour number written next to it. To align the RA setting circle we first need to find an object in the sky for instance Jupiter, you then need to look up its RA for that specific date and time. Once you know that you then turn the RA circle so that the pointer is pointing to Jupiter's (or whatever object your using) current RA, your RA circle is now aligned. Then you find the objects you want to observes RA and declination for instance m42 and slew your telescope until the RA and declination pointers are pointing at the correct degree (declination) and minute (RA). You should then be able to see the object in your eyepiece. To find and object with setting circles it is generally easiest to locate it with a low power eyepiece to give you a wider field of view.
Specific note for skywatcher explorer 130:
If you have this scope you will notice that the pointer for the RA moves with the dial, this shouldn't happen. To fix this once you have aligned your RA circle tighten the screw so that the dial turns with the mount, then you can use the mark in between the R and the A as a pointer.
This picture shows that the pointer moves with the setting circle for some unknown reason.
The RA circle is marked in hours and then minutes each hour will have its hour number written next to it. To align the RA setting circle we first need to find an object in the sky for instance Jupiter, you then need to look up its RA for that specific date and time. Once you know that you then turn the RA circle so that the pointer is pointing to Jupiter's (or whatever object your using) current RA, your RA circle is now aligned. Then you find the objects you want to observes RA and declination for instance m42 and slew your telescope until the RA and declination pointers are pointing at the correct degree (declination) and minute (RA). You should then be able to see the object in your eyepiece. To find and object with setting circles it is generally easiest to locate it with a low power eyepiece to give you a wider field of view.
Specific note for skywatcher explorer 130:
If you have this scope you will notice that the pointer for the RA moves with the dial, this shouldn't happen. To fix this once you have aligned your RA circle tighten the screw so that the dial turns with the mount, then you can use the mark in between the R and the A as a pointer.
This picture shows that the pointer moves with the setting circle for some unknown reason.
 |
| The Mark between the R and the A can be used as a a pointer. |
 |
| I Hope you have found my guide on how to use telescope setting circles, if you have any questions feel free to ask. |
Thursday, 26 April 2012
What magnifictaion to use for planets
|
Sunday, 22 April 2012
How to image the moon with sony cybershot and other digital cameras
I just thought that I would post a quick guide explaining how to image the moon with a digital camera, this guide is specifically for Sony cybershot w210, but can be used on most other point and shoot cameras.
Step 1: Set your telescope up outside and let it cool e.t.c
Step 2: Put in the eyepiece you are planning on using ,making sure the whole moon ( or the part of it you want to image) is in the eyepiece. If you are planning on doing a lunar mosaic I would advice using a webcam instead as this is particularly difficult to do using a point and shoot camera.
Step 3: Set up your camera, the settings I use on my sony cybershot w210 are ev 1.3 ( for the exposure you want to make sure you get the correct balance between showing lots of detail but not being over exposed) set the camera to video at its highest frame rate (for the cybershot this is 30fps). The last thing I do is set the camera to infinite focus as I find this works best.
Step 4: Attach the camera to your scope and focus, if you want to attach it to the scope you could use a camera adapter like this one: http://www.sherwoods-photo.com/meade_scopes/digital_mounts_fs.htm this will help improve your image compared to if you just hold up the camera to the eyepiece like I do.
Step 5: Zoom in on your camera so that the moon fills almost the whole field of view.
Step 6: Record between 1000 and 3000 frames using your camera, I normally use about 1500 while filming you may have to adjust the telescope slightly to keep the moon in the cameras view.
Step 7: Pack away your equipment and go inside
Step 8: open up registax on your computer and process your image, if you don't have registax you can download it here http://www.astronomie.be/registax/
Step 9: Save the final image onto your computer, at this stage I look to open my image up in photoshop or gimp and adjust the levels of brightness slightly.
Step 10: Admire you final image.
If you need any help or advice feel free to contact me.

Step 1: Set your telescope up outside and let it cool e.t.c
Step 2: Put in the eyepiece you are planning on using ,making sure the whole moon ( or the part of it you want to image) is in the eyepiece. If you are planning on doing a lunar mosaic I would advice using a webcam instead as this is particularly difficult to do using a point and shoot camera.
Step 3: Set up your camera, the settings I use on my sony cybershot w210 are ev 1.3 ( for the exposure you want to make sure you get the correct balance between showing lots of detail but not being over exposed) set the camera to video at its highest frame rate (for the cybershot this is 30fps). The last thing I do is set the camera to infinite focus as I find this works best.
Step 4: Attach the camera to your scope and focus, if you want to attach it to the scope you could use a camera adapter like this one: http://www.sherwoods-photo.com/meade_scopes/digital_mounts_fs.htm this will help improve your image compared to if you just hold up the camera to the eyepiece like I do.
Step 5: Zoom in on your camera so that the moon fills almost the whole field of view.
Step 6: Record between 1000 and 3000 frames using your camera, I normally use about 1500 while filming you may have to adjust the telescope slightly to keep the moon in the cameras view.
Step 7: Pack away your equipment and go inside
Step 8: open up registax on your computer and process your image, if you don't have registax you can download it here http://www.astronomie.be/registax/
Step 9: Save the final image onto your computer, at this stage I look to open my image up in photoshop or gimp and adjust the levels of brightness slightly.
Step 10: Admire you final image.
If you need any help or advice feel free to contact me.

Wednesday, 18 April 2012
Moon Occulations
I am very excited about the upcoming moon occulations which will be happening on the 25th and 29th of April. If you dont know what an occulation is it is an event where the moon passes in front of and blocks the light from a star. I am really looking forward to these as I have never seen one before, the occulation on the 25th is an occulation of the star Zeta and to view it you need to start looking at 9pm the star veta is mag +3.0. The second occulation on the 29th is an occulation of the star Kappa and you need to start viewing it at 11:30pm and the star Kappa is +5.2 mag. Sadly at the minute the forecast is cloudy for the 25th, but hopefully the forecast will change before then. The star will be behind the moon for about 30 minutes on both occassions I am going to try and image them and I will inform you how it goes.
Sunday, 15 April 2012
Stargazing In Cornwall
I have just arrived home from my holiday in Cornwall where I had hoped to do lots of stargazing, I had read on various websites about how from the dark Sky's in St Agnes Cornwall you can see the milky way over head. I was very excited about the prospect of seeing the milky way for the first time, so I decided to take my praktica binoculars. We decided to stay in a place in Cornwall called Portreath which was only 5 minutes away from St Agnes so that meant that it should still have pretty dark skies.I checked the weather forecast before I went and it said that there should be 3 clear nights during the week that I was there. The first night that we arrived had a clear sky but i decided to stay inside and catch up on my sleep as I had got up at 4am that morning, as there were supposedly to other clear nights ahead. But sadly as the week went on there was rain and clouds meaning that I didn't have a chance to see the milky way, I am planning on going back in October so I can always try again then. I really enjoyed my stay at Portreath as there was a nice beach and an active harbour, if you are planning on going to Cornwall I would recommend staying there. The stay was also a good chance to use my binoculars on boats at sea as the house we were staying in had a sea view, the binoculars once again impressed me and I found them very useful throughout the holiday. Portreath is only about a half an hours drive away from Fistral beach which is great for watching surfing ,and about 20 minutes away from St Ives which is a very nice seaside town. So even though I wasn't able to see the milky way on my holiday I still enjoyed my holiday in Cornwall.
Friday, 6 April 2012
Full Moon with skywatcher explorer 130
Last night I managed to use my new scope for the first time and I have to say that I found the views amazing considering the reasonably small aperture of this scope. Even though the conditions were very hazy that didn't stop me having a good observing session on the moon. I decided not to wait till 11pm for Saturn to come over the horizon and called it an early night at 9:30pm this was due to the fact that a combination of a full moon and lots of haze would of made very poor viewing conditions. Towards the end of my session I decided to have a quick attempt at imaging the moon, but made the stupid mistake of not using the cameras zoom so that the moon filled most of the field of view. This resulted in meaning that if I try and zoom in to see detail on the finished picture it gets very pix elated. So hopefully I wont make that mistake next time!! So that meant that the finished image is made up of a small moon and lots of black sky. I think considering the viewing conditions and my mistake, apart form being slightly over exposed it turned out well. Stacked with the best 200 frames out of 1000 frames in registax and i adjusted the sharpness in photoshop. Any comments and advice would be appreciated.I will post the review of my scope when I get back from holiday in a week.


Wednesday, 4 April 2012
Praktica 10x50 binoculars review
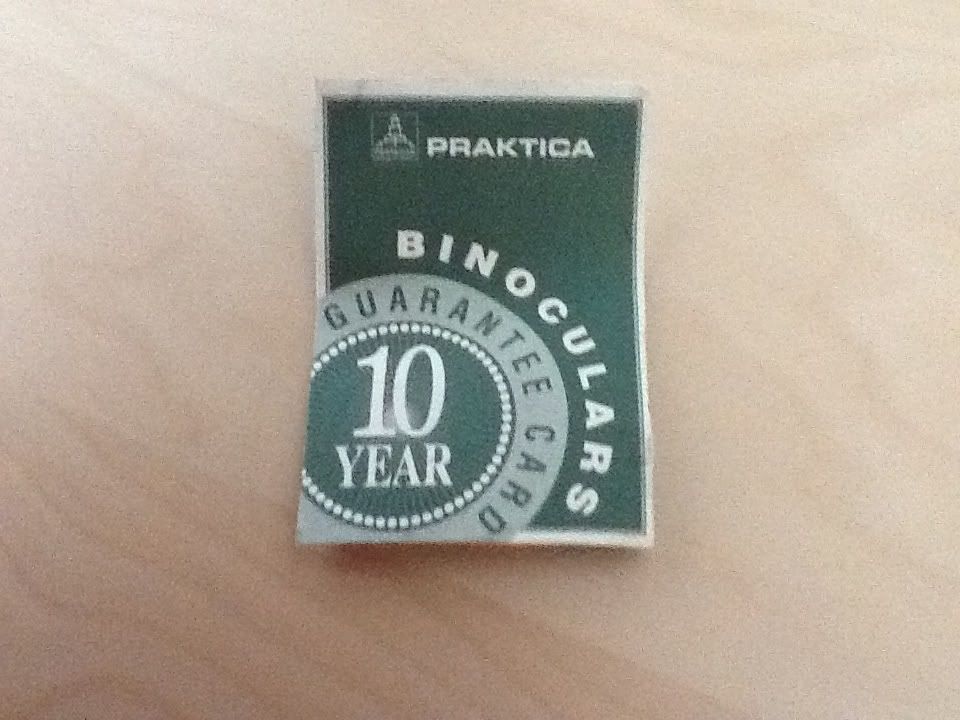
I recently was given the praktica 10x50 binoculars as a birthday present and I have to say that I am pretty impressed with them. With the binoculars you get a case, rubber eyepiece covers and a 10 year warranty. To start with the case is ok but I found that when I accidentally put the binoculars in it the wrong way round it started to split, but with a bit of sewing this was easily fixed and was no big deal. The rubber lens covers for both the front and rear lenses are a good fit and useful for protecting your binoculars. I also thought that the Tripod adaptor on the binoculars was useful especially if you plan on observing things like the moon with them. I found that the binoculars were quite easy to focus and had only a tiny amount of chromatic aberration at the edges of the field of view. Weighing in at 820g the binoculars are quite heavy which makes them quite difficult to hold steady unless you are using a tripod or you are resting the binoculars on something. The binoculars have a field of view of 5.7 degrees which makes it good for viewing things like star clusters. With these binoculars I was email to see the seas on the moon a lot more clearly than with the naked eye. But if you want to view things like planets with detail then I would advise that you get a telescope instead. I personally find these binoculars pretty good for testing the viewing condition and learning to navigate the sky. To sum up overall I was very pleased with the quality of the binoculars for the quite small £30 price tag. Also if you plan on getting any binoculars I recommend that you get the Philips stargazing with binoculars book as I found that this was very useful for learning to do astronomy with my binoculars.


Finished processing full moon
Just thought that I would make a post about an image which I took a while ago with my 60mm refractor. This was only the 2nd image that I have ever taken so I was pretty happy with it. Hopefully when the weather clears up I can have another go at imaging with my new skywatcher. Anyway here it is took with Sony cybershot the final image was stacked out of the best 200 frames in registax. Any comments would be appreciated.

snow
I was planning on testing out my new telescope tonight but I couldn't because of the snow. Hopefully the snow will clear up soon and I will get a chance to test my new scope so that I can write my review on it.
alisastronomyblog
alisastronomyblog
Tuesday, 3 April 2012
Welcome
Hi
Welcome to alisastronomy blog. I intend this to be a blog of my progress as I learn more about the hobby of astronomy. My current telescope is a skywatcher 130eq which I got yesterday but I haven't had chance to try it out yet because of the clouds!!! Anyway, I will try and keep this blog updated with my observations, my images and any tips or tricks I learn along the way.
alisastronomyblog
Welcome to alisastronomy blog. I intend this to be a blog of my progress as I learn more about the hobby of astronomy. My current telescope is a skywatcher 130eq which I got yesterday but I haven't had chance to try it out yet because of the clouds!!! Anyway, I will try and keep this blog updated with my observations, my images and any tips or tricks I learn along the way.
alisastronomyblog
Subscribe to:
Posts (Atom)